Guide to PyCharm for Windows and MacOS
Table of Contents
- About PyCharm
- PyCharm Editions and Features
- Popular Plugins
- Pycharm Installation on Windows and MacOS
- Going forward
About PyCharm
PyCharm is a fully-featured IDE for the Python language, based on the powerful IntelliJ Idea Java IDE from JetBrains. Not only does PyCharm support an array of enterprise-level features, but it’s also a pleasure to work with. For many curious developers, PyCharm is the next step after learning environments like iPython notebooks, and is a popular choice for full stack application development.
PyCharm leverages management of project environments (VENV), the Python interactive console, Jupyter Notebooks, and even a system terminal emulator to make Python editing user-friendly. Developers with experience in Eclipse or Visual Studio will find PyCharm comfortable and intuitive. The PyCharm IDE focuses exclusively on Python language applications instead of generalizing to a wide array of languages with unnecessary tools.
Many Python coders enjoy the ability to follow declarations of classes and methods as though they were links in a web page, instantly opening relevant source files. Active code inspection highlights potential issues – such as unexpected arguments and unused import statements – which could be using valuable resources, or just taking up space. These inspections may be turned on or off quickly from the settings search bar.
PyCharm Editions and Features
The majority of features are included in PyCharm Community Edition (free), which is an excellent tool for getting started with PyCharm. Most python language use-cases are covered in the community edition. However, there are some advanced features only available in the Professional edition, with a monthly or annual subscription ($8.90 per month as of this blog post).
Critical IntelliJ IDE features are included in the free Community Edition.
Core Features (All Editions)
Both Community and Professional editions allow advanced editing of the Python language. The free Community edition is an excellent tool for working with and understanding Python.
- Visual Debugging
For single-threaded applications, debugging in the console line-by-line is often the best choice. Code snippets can be executed easily without running the entire file. However, PyCharm offers a smart, visual debugger for multi-threaded applications like Django web apps. Breakpoints are easily set in the source code, and the current values and types of variables are displayed on execution. Switching to a different frame shows the current line, even in an imported module running in another thread.As the code is executed, graphical buttons and keyboard shortcuts allow the coder to “step into” the code, one line at a time, or resume until the next breakpoint. Frames and contexts are updated based on the current module and thread.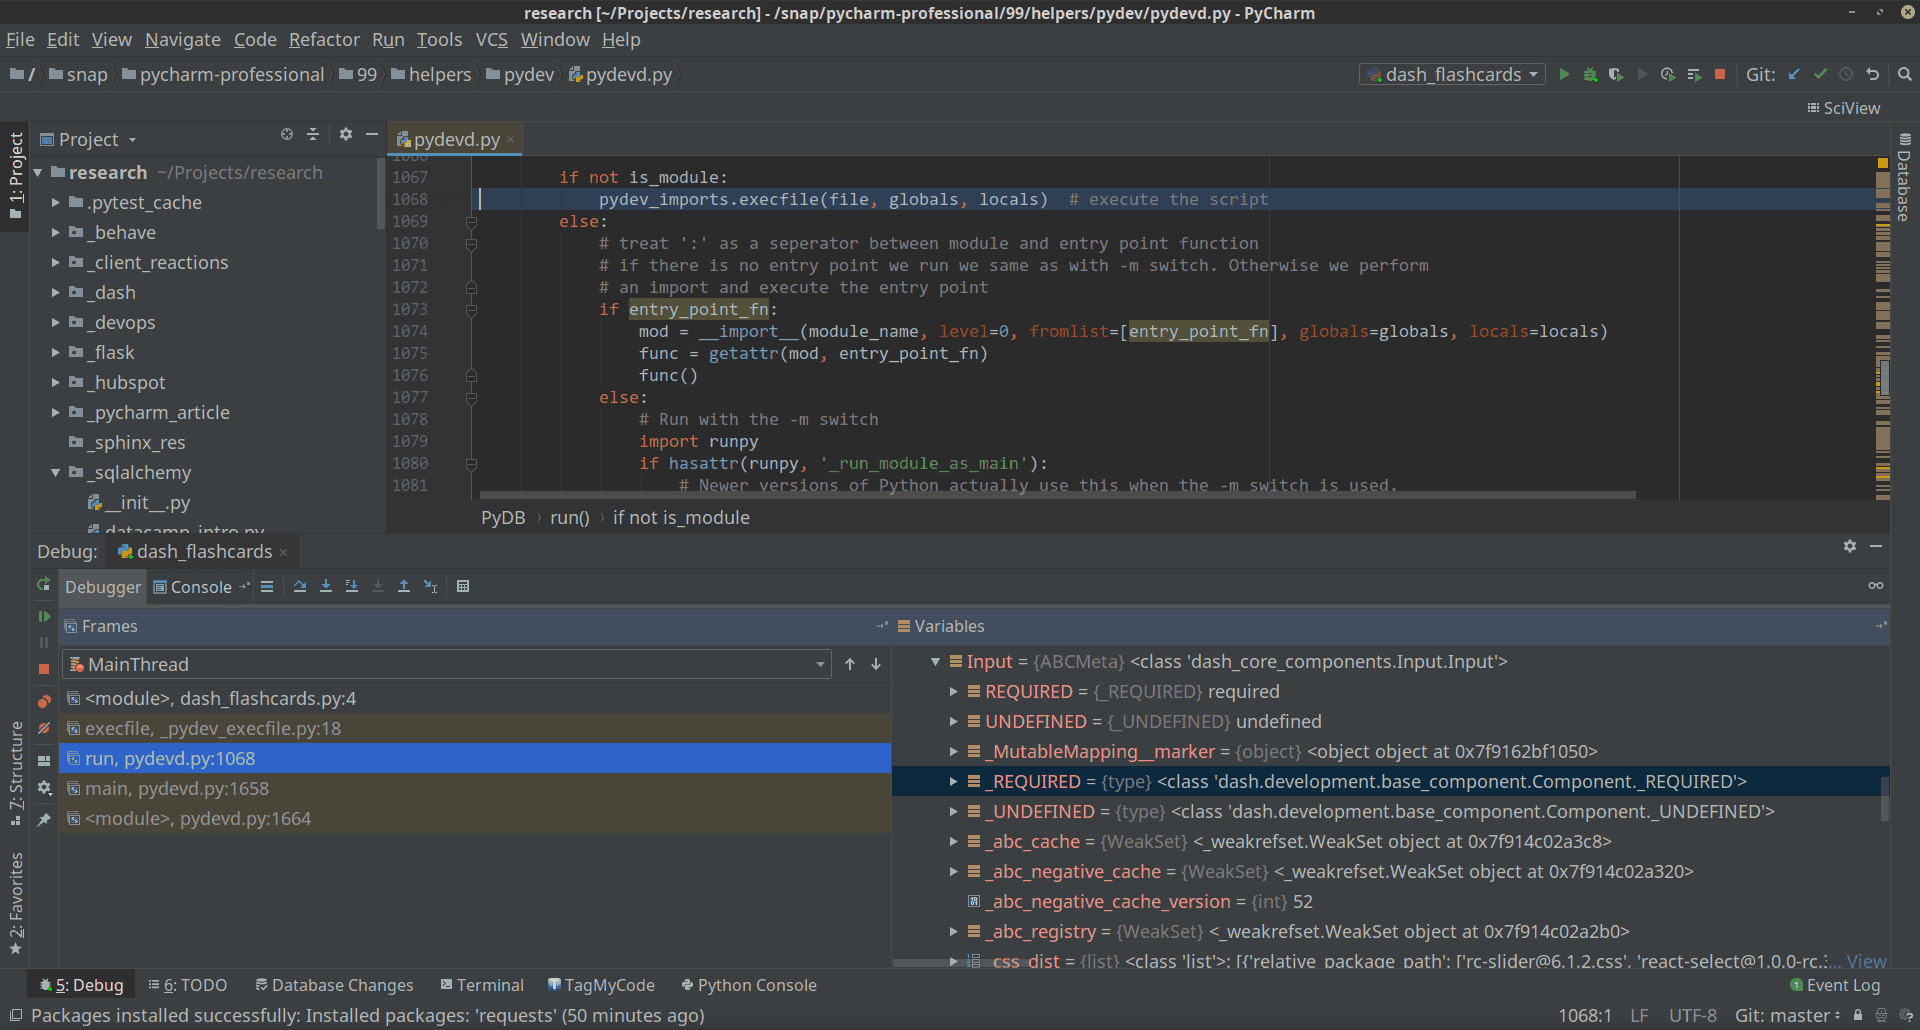
- Code Inspection, Syntax Highlighting
For many developers, syntax highlighting encompasses the entire purpose of an IDE. Python coders get a high-level view of their code, quickly seeing the difference between class definitions, methods, and data types with Syntax highlighting.Method and Class definitions stand out, while strings and numerical types are more subtle. IntelliJ has included a variety of color schemes, but the default themes are suitable for most use-cases. In addition, comments utilizing Python’s self-documenting syntax are auto-populated for classes and functions.PyCharm inspects every definition to check that your code will run in the Python interpreter even before execution. - Version Control
PyCharm is compatible with a variety of version control systems (CVS, Git, etc.) that are accessible from the Tools menu. Projects can be updated with the click of a mouse or via customizable shortcuts. Updates may be committed to version control with the click of a button, or with customizable shortcuts as well. - Automatic PEP Formatting
Python developers understand the importance of complying with community standards, such as PEP8. Simply by pressingControl + Alt + Lsource code is formatted with standards that are difficult to see in plain text editors, like replacing tab characters with spaces, or adding a specific number of blank lines between comments, class definitions, and functions. Auto-formatting also cleans up python data structures (like deeply nested dictionaries) to make them more readable. - Graphical Installation of Python Modules
Most Python projects import packages and modules from the open-source community via the PyPi registry. While the command line is the fastest way to install a known-module, many coders find it convenient to browse the selection from inside the IDE. PyCharm installs and inspects these modules behind the scenes while the developer continues working, with notifications about progress – and even memory usage – in the status bar.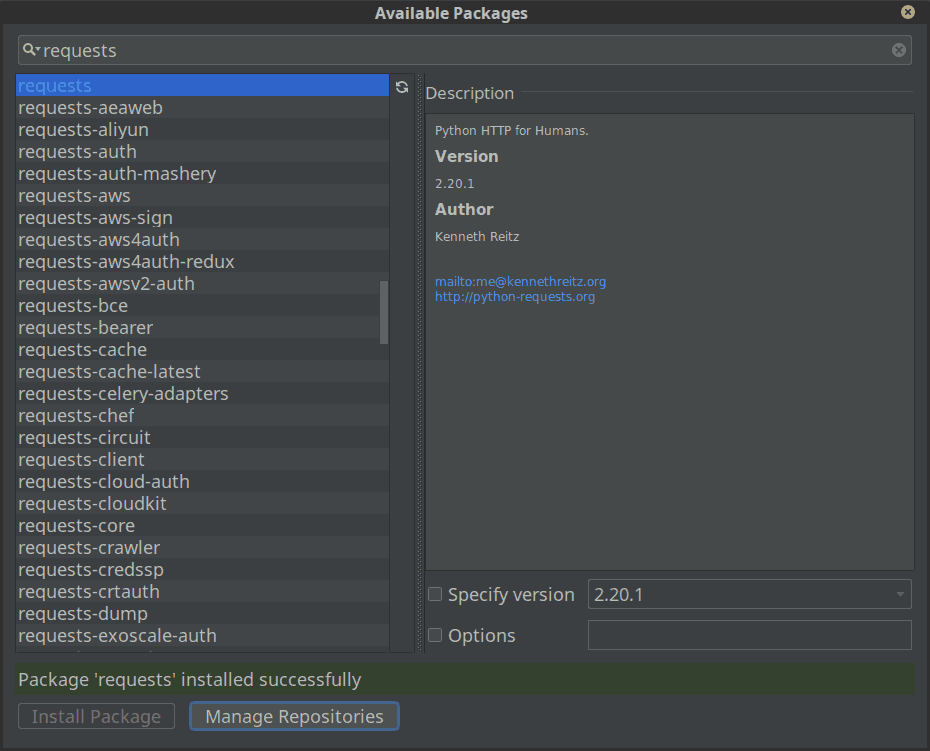
Best Plugins for Pycharm
We’ve found the best plugins for PyCharm so you can code more efficiently.
Professional Features (Paid Professional Edition Only)
The most common professional features fall into three categories:
- Web Development
Web developers who work with Python frameworks like Flask, Pyramid, or Django will benefit the most from PyCharm Professional edition. Stubbed out projects with ready-made run configurations are available out-of-the-box. - UML Diagrams
Complex applications can be confusing to navigate, and no two diagramming tools are alike. While Pythonistas rarely shy away from complexity – simplicity and readability are core values for the community. Developers can easily tease apart complicated code structures by right clicking a python file and generating a UML Class diagram. - Database Tools
Python is known for being data-friendly, and developers and novices often want to see their data without hunting for third party tools. PyCharm professional allows developers to access table visualizations and inspect data via automatically generated SQL queries. Simply clicking on a database file reveals an array of tools which rival third party SQL database suites, like MySQL Workbench.
Popular Plugins
Although PyCharm is an excellent IDE on its own, third parties have created hundreds of useful enhancements. Developers can install plugins from the settings >> plugins menu Control + Alt + S. Plugins are created both by IntelliJ to implement features, third party companies, and by the Python community.
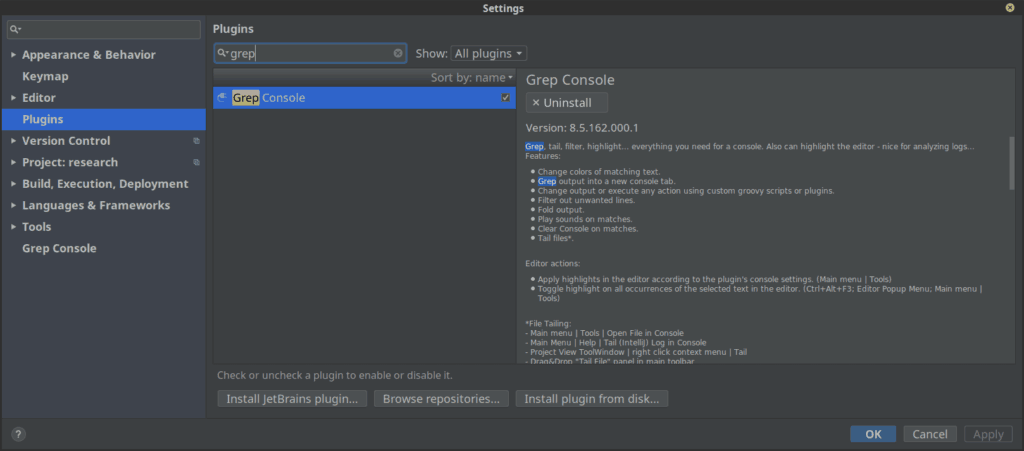
- Grep Console
Grep console highlights console output based on simple regex search patterns. This plug-in will even play custom sounds when a program outputs a specific pattern. For example, Grep Console could play a song when a test-suite passes, or sound an alarm on failure. - Kite
Kite is an exciting, AI-driven copilot. Kite detects common expressions, and displays module documentation as you go, inspecting your code and making intelligent suggestions. Although you may configure the Kite plug-in from settings, it is automatically added to PyCharm during the Kite installation process.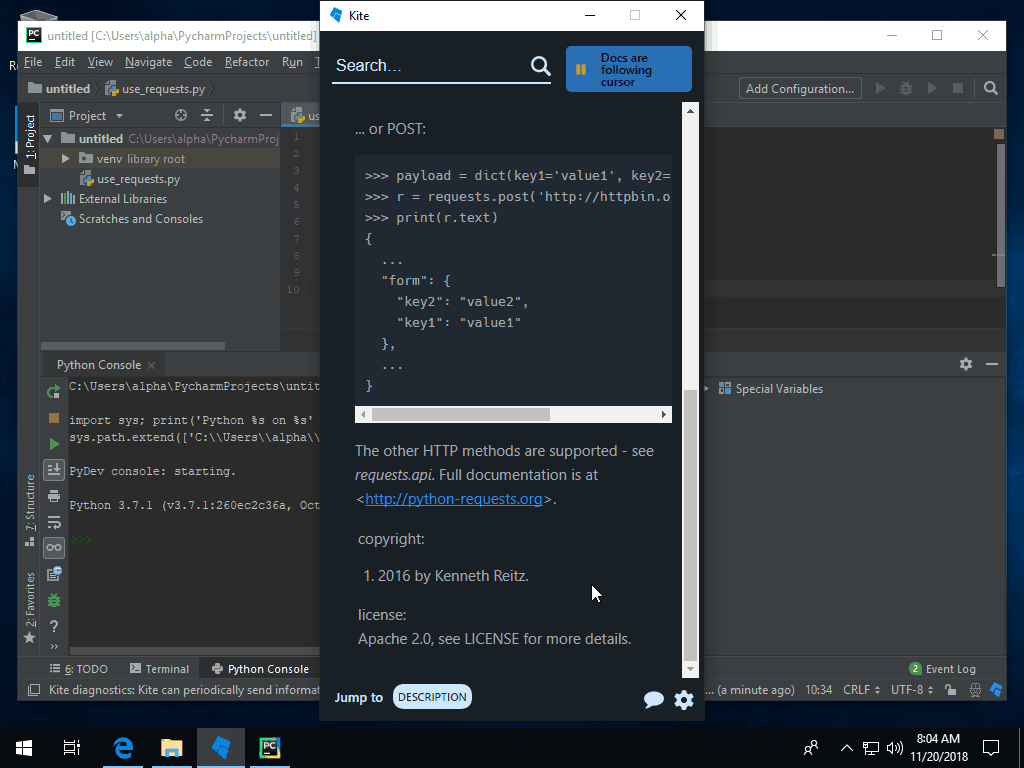
- Github
The Github plug-in places commit, push, and even rollback buttons right on the toolbar, allowing teams on Github to rebase their local code without leaving the IDE. Developers can map keyboard shortcuts to each command, check todo items before a push, and see diff comparisons in the commit pop-up. - JSON and CSV Formatting
These two plug-ins highlight JSON syntax and format CSV files in way that is easy on the eyes, clearly identifying rows columns. The JSON plugin reveals formatting issues and errors when saving JSON data to a static file.
Other popular plugins include Docker integration, .ignore (an extremely thorough creation of various ignore files), and IdeaVim (Vim keyboard shortcuts for IntelliJ).
Pycharm Installation on Windows and MacOS
Setting up PyCharm on Windows
Python developers choose PyCharm for Windows due to simplicity and predictability. PyCharm is compatible with any version of Python, and may even be installed before choosing a distribution of the Python interpreter.
- Download PyCharm
Open your favorite browser, and head to the Pycharm download section, which will detect your OS. PyCharm is available for both 32 bit and 64 bit machines.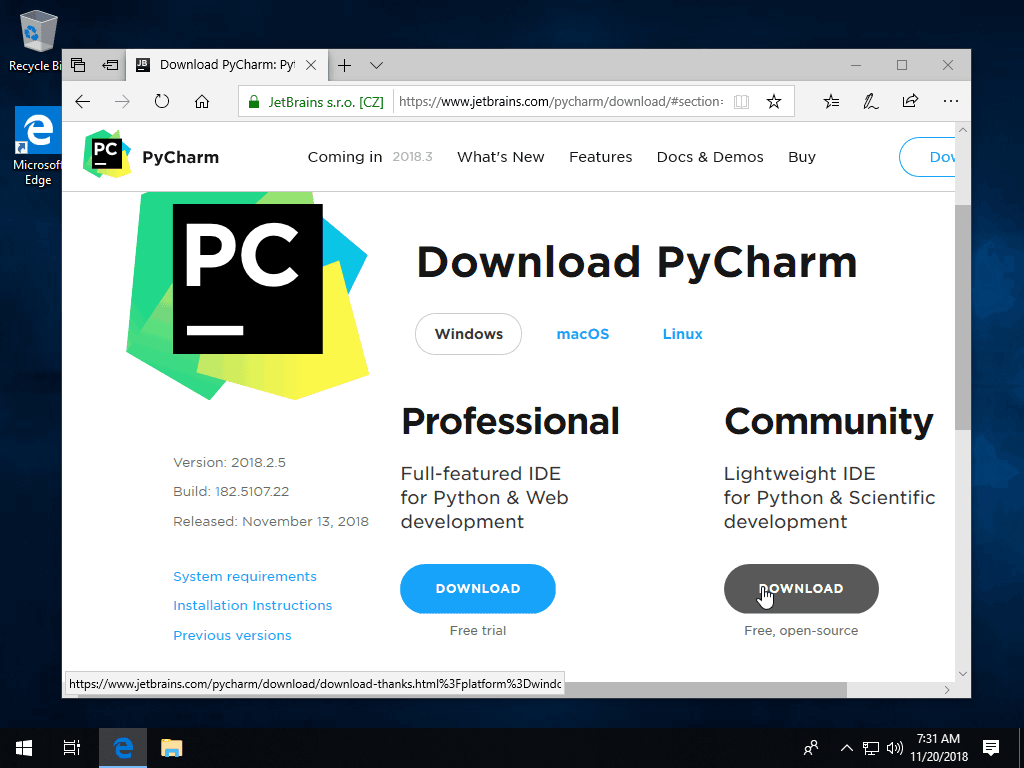
- Begin the Installation Process
Once your download is complete, navigate to the executable file in the explorer. Run the executable file. The windows installer for PyCharm is straightforward and intuitive.It is a good idea to associate PyCharm with.pyfiles, especially if PyCharm is the primary Python IDE.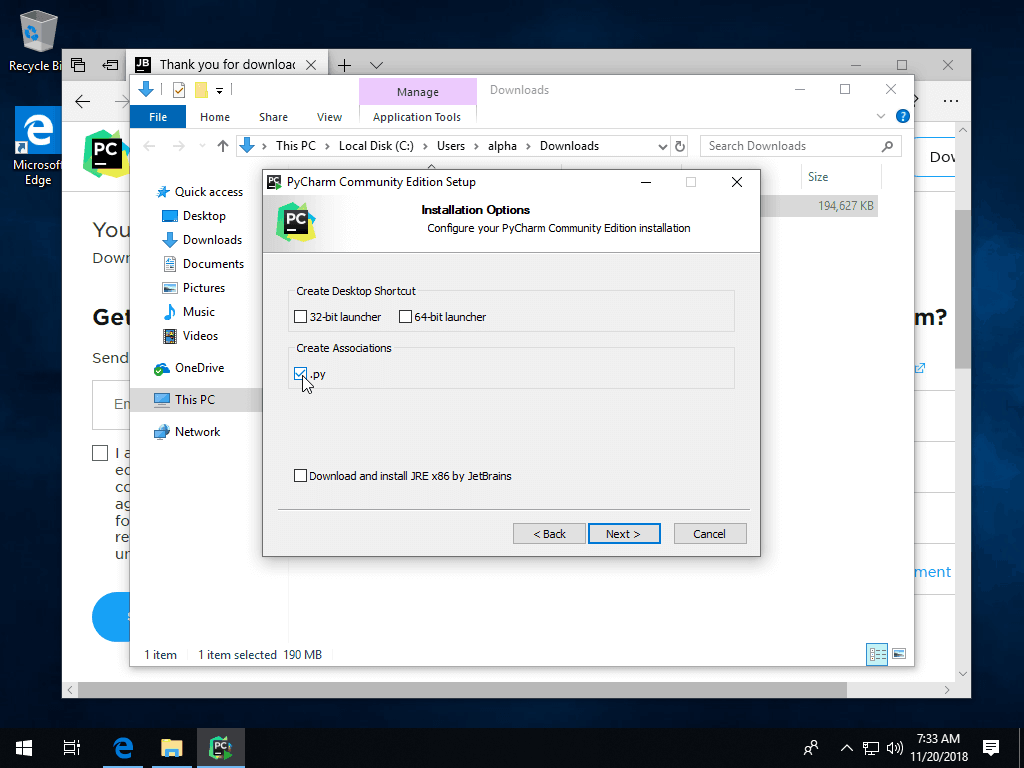
- Configure PyCharm
Python may be installed before or after PyCharm installation. Usually, Python should be installed in a location that is easy to find, likeC:/Python37.The most important step is pointing PyCharm to your Python distribution. Consult your Python distribution, or search for python.exe in the file explorer. In this case, we see the location of python 3.7. You will not be able to execute Python without first installing a distribution on Windows.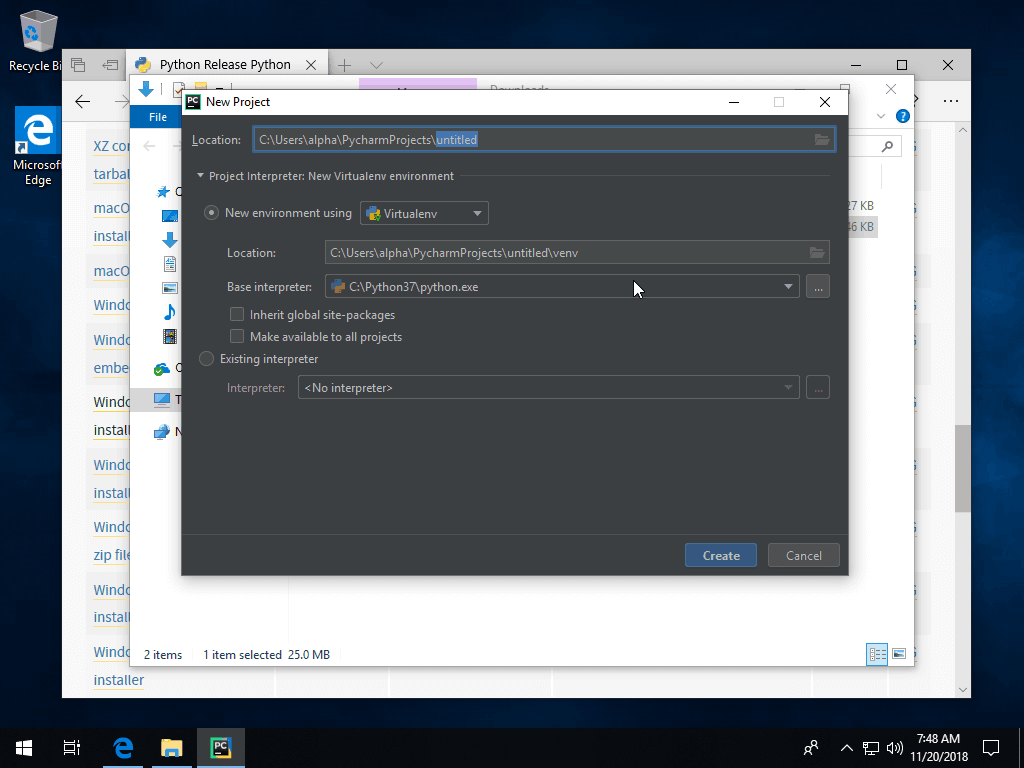
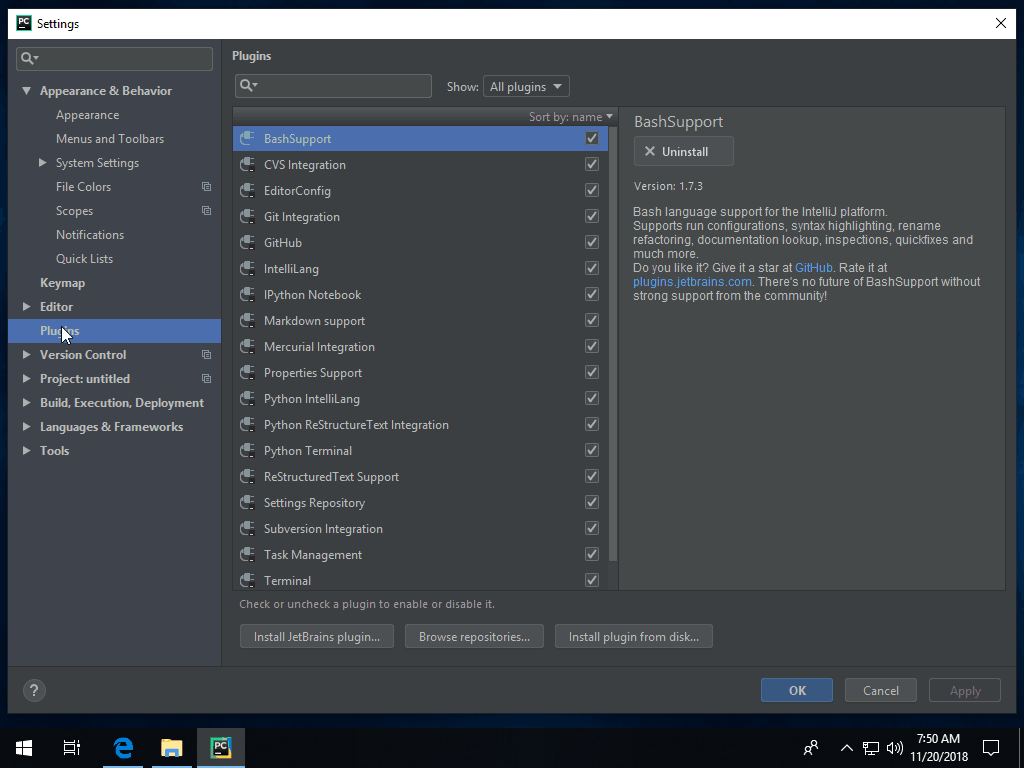
Plug-ins and settings can be changed in the settings menu (File >> Settings).
- Create a Project and Start Writing Python
When a new project is created, PyCharm will populate the virtual environment, which may take a moment. After the project is created, add a new Python file from a folder’s context menu.
- Install Plugins from an Open Project
Additional plugins may be installed globally from any project. From an open project, open “Settings” from the File menu (or pressControl + Alt + S). Select “Plugins” from the settings hierarchy on the left, and search for plugins by name. To see third-party plugins, click “Search in Repositories.” Plugins developed by IntelliJ are shown separately from those developed by third parties.
Finally, click “Install.” Menu items and context menus will be automatically updated with commands for your new plugin.
- Install Python Modules
Python modules may be installed via the built-in terminal using pip, or from project settings, which runs pip behind the scenes. The package browser allows developers to read about packages before installation, and select from the available versions.
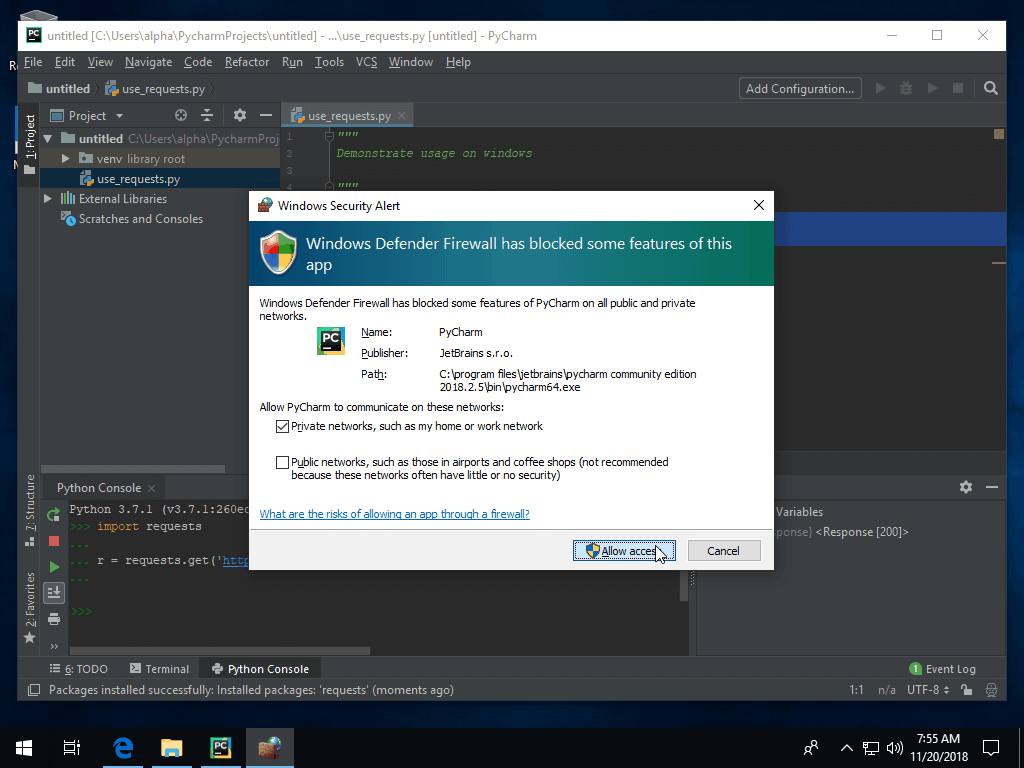
Note: Windows users will need to explicitly allow PyCharm to access the internet, so that modules which access data can traverse the firewall.
Setting up PyCharm on MacOS
In this example, we’ll install PyCharm on MacOS (High Sierra). Remember to install a Python distribution. PyCharm will automatically look for local installations of Python.
- Download PyCharm
Open Safari or your browser of choice, and head to the Pycharm download section, which will detect your OS.
- Begin Installation
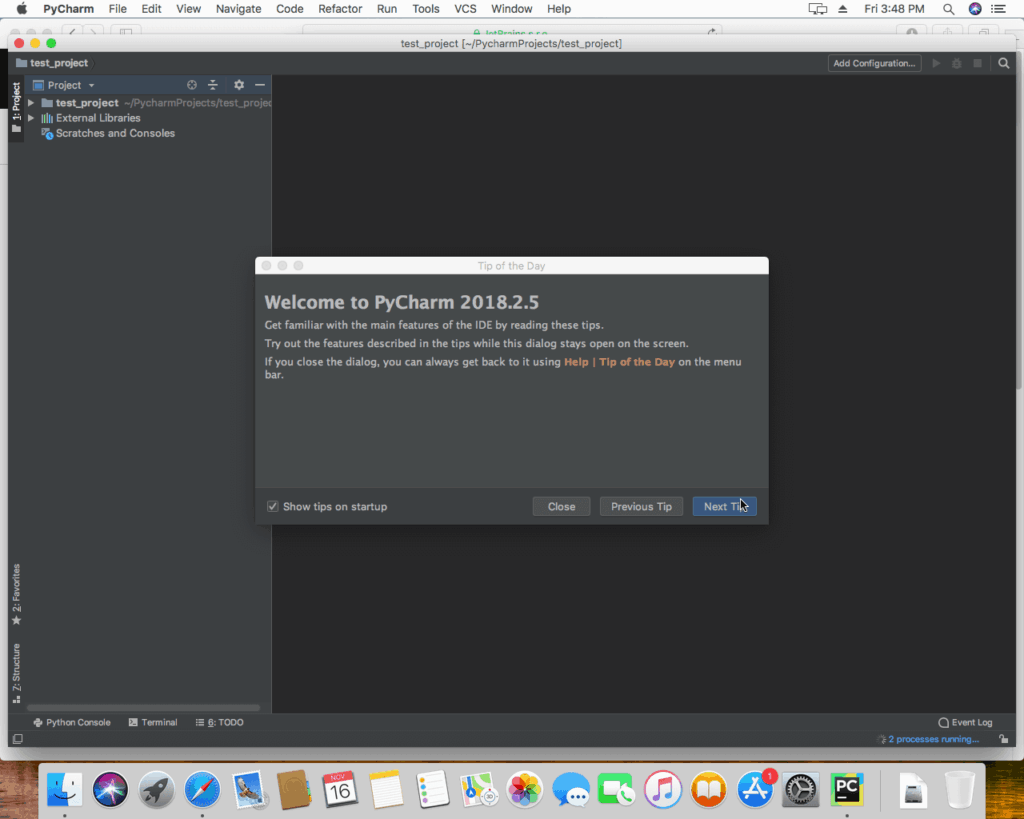
Once the PyCharm installation files has been downloaded, run the program and follow the instructions. Drag the program into applications, and verify the installation as requested. Select color scheme according to preference. The color scheme may be changed at any time from the “Preferences” menu.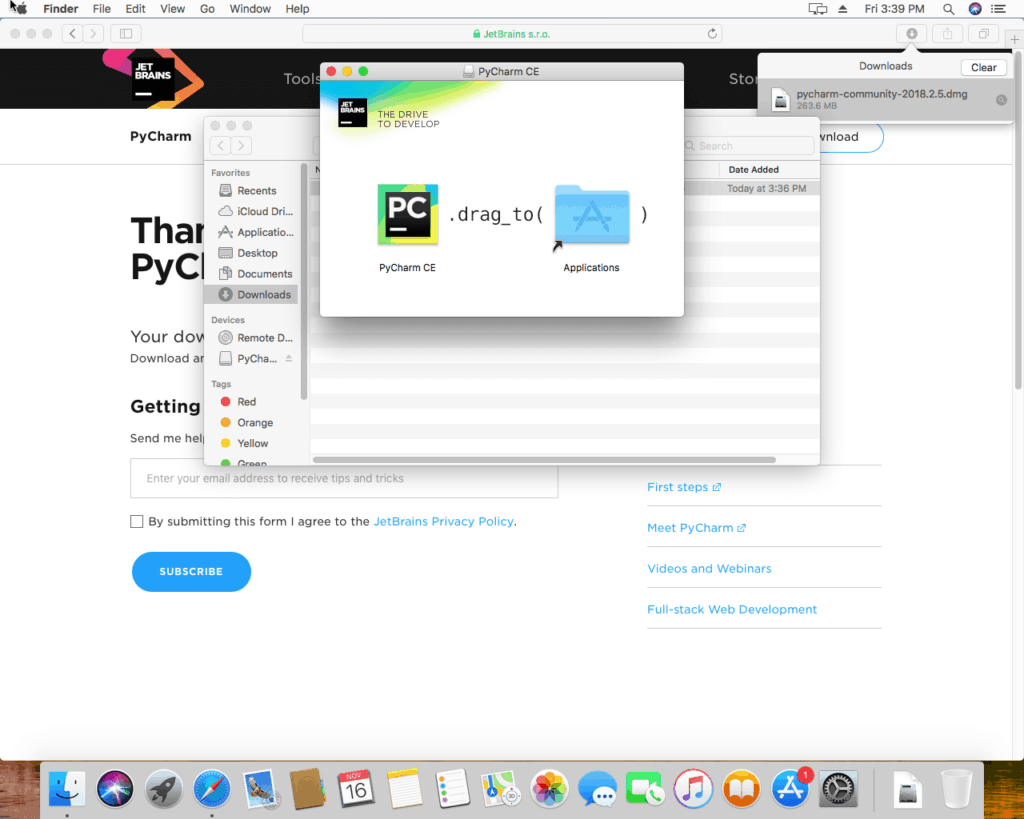

- Install Featured Plugins During Setup
Some useful plugins are offered during installation. Of these, most users should install Markdown and Bash support. Markdown will allow previewing documentation for Python projects. Vim Keybindings are only helpful for those coming from Vim, while R language is a non-Python language useful in Data Science. These can be installed at any time from “Preferences.”
- Create a Project and Start Writing Code
Because MacOS ships with Python, PyCharm does not explicitly require pointing to the Python distribution. However, changing distributions will require some configuration. This is shown in the settings dialog under project >> interpreter.When starting a new project, Pycharm offers the default system environment, or the option to create a Virtual Environment (VENV) specific to the project, which will refer to the local Python installation. MacOS is distributed with Python 2.7, but 3.7 is the latest supported version of Python.
Finally, a new project is created. A fresh python file may be created from the file menu, or by adding a file from a folder’s context menu in the project view.
- Install Plugins from an Open Project
Additional plugins may be installed globally from any project. From an open project, open “Preferences” from the PyCharm menu (or press⌘ + ,). Select “Plugins” from the settings hierarchy on the left, and search for plugins by name. To see third-party plugins, click “Search in Repositories.” Plugins developed by IntelliJ are shown separately from those developed by third parties.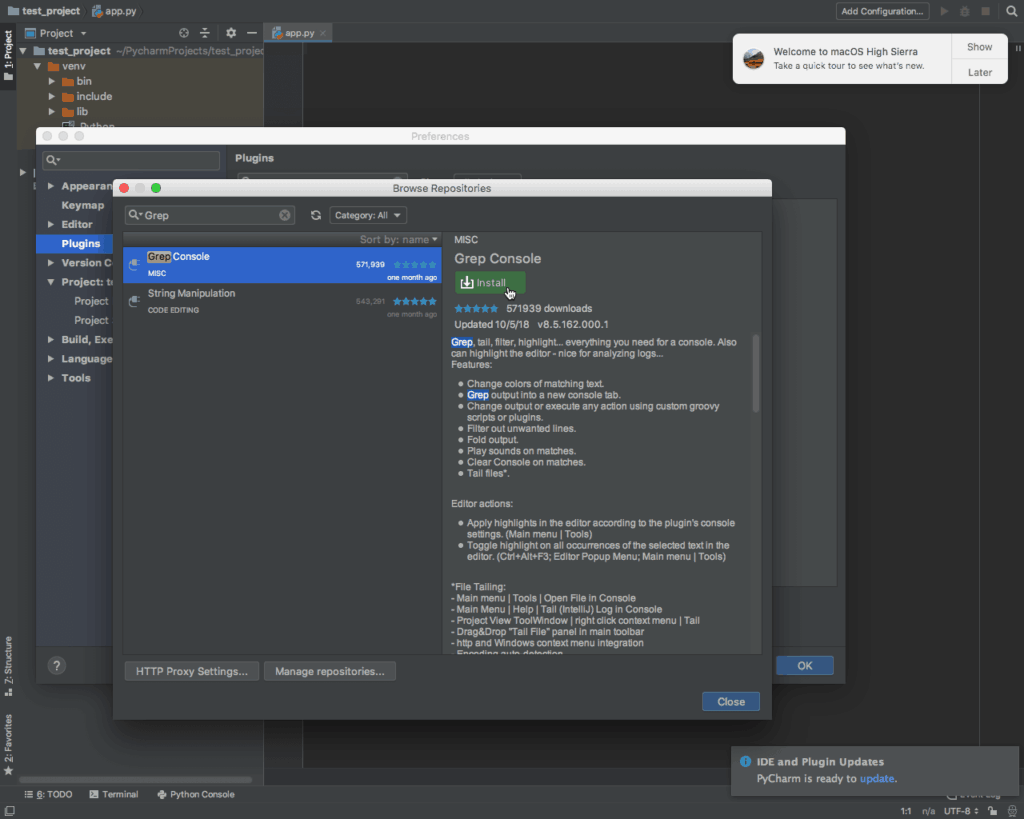
Finally, click “Install.” Menu items and context menus will be automatically updated with commands for your new plugin.
- Install Python Modules
Python modules may be installed via the built-in terminal using pip, or from project settings, which runs pip behind the scenes. The package browser allows developers to read about packages before installation, and to select from the available package versions.
Going Forward
PyCharm is rapidly becoming the de facto IDE for developers who need to focus on business productivity or advanced learning in Python, and spend less time writing print statements to debug their code. Easy to install on both Windows and MacOS via the Java runtime, PyCharm is a powerful tool for creating value with the Python language and community.
Resources
 in San Francisco

